If you have never been to Bottle and Bottega - GO! It was SO MUCH FUN! I went with a group of fellow mommies. We had an amazing time!
This blog is a hodgepodge of things I want to share, from the good deals I find to my newfound cake decorating hobby and everything in between. Enjoy!
Showing posts with label Arts and Crafts. Show all posts
Friday, May 23, 2014
Christmas Cupcakes, Cookies and Presents!
Christmas was awesome this year! Toddlers bring back the magic that is Christmas morning, so although this wasn't my son's first Christmas, it was definitely the first one where he (kinda) knew what was going on! I have a few Christmas items to blog about, so I'm going to combine them all into this one post.
Christmas Cupcakes
I made cupcakes for my office Christmas party. I thought I would try a new concept that I saw on Pinterest- making cupcake toppers with melted chocolate. I used the vanilla Wilton candy melts died the colors I needed.
Apricot Cookies
My Grandmother was "famous" for her apricot cookies. I never at them as a kid- but most of my family went crazy for them. For mom mom's gift, my sister had the idea to get her a platter from www.customsepia.com with my grandmothers handwritten recipe on it. To top it off, I decided to try to make the cookies as an added surprise. They turned out pretty great- but probably not as good as Grandma's!
Busy Board
So this one I didn't make, but my dad did as a gift for my son. A coworker told me about the concept of a busy board, and I thought it would be perfect for my busy toddler. Here is what my dad came up with. My son's favorite part is the whistle!
Friday, March 29, 2013
DIY Headbands!
DIY Name Hanger (for the new bride...)
I have always seen clothing hangers on Etsy that would make the perfect gift for a bride. They are customized with the future name of the bride such as "Mrs. Smith" and would make for some gorgeous photos with a wedding dress hanging off of them.
A friend of mine is getting married next weekend, and I really wanted to purchase one of these hangers for her bachelorette party. After looking at the price of them (you already know how cheap I am), I decided that I could easily make this myself!
Here are the supplies I used:
A friend of mine is getting married next weekend, and I really wanted to purchase one of these hangers for her bachelorette party. After looking at the price of them (you already know how cheap I am), I decided that I could easily make this myself!
Here are the supplies I used:
- A nice wooden hanger stolen from my husbands side of the closet. (I'm sure he loves that one of his work shirts is now on a "crappy" white plastic hanger!)
- Pretty ribbon, which I already had from wrapping Christmas Presents. (I suggest a neutral such as the white and brown I used, or ribbon using the brides wedding colors.)
- Craft wire. (I had some leftover from a previous Pinterst project which I got in the floral section at Michaels, but I also found this example on Amazon.)
- Screw driver and screws
- Glue
I sculpted the wire into the new last name of the bride. This took some trial and error, but I finally got it to look how I wanted. Remember to keep measuring the name so that it fits between the arms of the hanger. Then, I took a screwdriver and used the screws to make small holes on the inside arms of the hanger. I put a dab of glue inside the holes, and then inserted the ends of the wire into the holes. Finally, make a nice bow and secure around the top of the hanger with some glue! Done!
Thursday, November 29, 2012
Established Wooden Sign
Inspired by some of the wooden signs on Pinterest, I decided to make one for my son's door. I started with a wooden board from Michaels and some acrylic paint. I painted the whole board brown and let it dry. Then I found some stickers and arranged them on the board. I painted blue paint over it, and once dry I removed the stickers. Here is the finished project.
Wedding Invitation Ornaments
I'm sure everyone has seen the clear glass ornaments on Pinterest with someone's wedding invitation curled up inside. It's pretty self explanatory on how to make these so I won't explain the process. Here are the ones I made for my sister and a friend. I think they turned out cute. I also made one for another friend, but forgot to take a picture! If I can get her to send me a picture of it I'll add it in later!
Friday, September 21, 2012
DIY Decorative Pumpkins
For September's Pinterest project we decided to welcome the fall weather by decorating pumpkins for fall and/or Halloween! I wanted mine to be used September-November, so I went with a fall theme. My inspiration came from this Pinterest Post.
A trip Hobby Lobby for burlap and Michael for everything else gave me some inspiration. Here is what I started with:
To complete the project, I also needed fabric scissors, mod podge and hot glue.
I used the burlap and ribbon to make bows for each of the pumpkins. I then made burlap fabric flowers with the skills I learned at a past Pinterest party!
I also wanted some type of leaves, so I found a pumpkin leaf template on Google images and printed it in various sizes. I cut the burlap into leaf shapes and then used mod podge to coat the edges and dipped them into glitter. I remembered that pumpkins usually have a curled stem, so I used the flower wire to make curls, coated them in mod podge and also dipped them in glitter.
I glued it all together on the pumpkin, added some glitter embellishments and was very satisfied with the final result. These will look adorable on my front patio!
A trip Hobby Lobby for burlap and Michael for everything else gave me some inspiration. Here is what I started with:
- Two white pumpkins
- A yard and a half of burlap (this was way more than I needed)
- Some bronze glitter letters
- Some bronze glitter
- Bronze flower wire
- Brown transparent wire ribbon
To complete the project, I also needed fabric scissors, mod podge and hot glue.
| Supplies |
| White Foam Pumpkins |
I used the burlap and ribbon to make bows for each of the pumpkins. I then made burlap fabric flowers with the skills I learned at a past Pinterest party!
| Burlap Fabric Flowers |
| Burlap and Ribbon Bow |
I also wanted some type of leaves, so I found a pumpkin leaf template on Google images and printed it in various sizes. I cut the burlap into leaf shapes and then used mod podge to coat the edges and dipped them into glitter. I remembered that pumpkins usually have a curled stem, so I used the flower wire to make curls, coated them in mod podge and also dipped them in glitter.
| Burlap Leaves and Wire Curls |
| Final Product |
Monday, August 27, 2012
Knit Baby Blanket, Part 2
I posted a few months ago about a baby blanket I made for a friend. I used the same pattern to make a blanket for my son, due November 15th. Since I knew the gender, I went with a mix of yellow, brown, blue and green.
Here is the pattern:
Cast on 5 sts.
Row 1: Knit
Row 2: K3, yo, K2- 6 sts.
Row 3: K3, yo, K3- 7sts
Row 4: K3, yo, K to end of row.
Repeat row 4 until you have the blanket size you want.
Next (decrease) row: K2, yo, K2tog, K to end of row.
Rep last row until 5 sts. remain. Bind off.
Weave in ends.
The only problem I ran into was that the blanket is a bit diamond shaped instead of square, and I'm not sure how it happened! I do know that the baby won't care, so it is what it is!
Friday, July 27, 2012
DIY Vases
Our July Pinterest party was at Tara's beautiful new home, and we decided to paint vases. I wanted to do two types of vases that I found on Pinterest, painting the inside of a vase and painting a vase with frosted glass. After setting up a well vented area and putting on a protective dust mask, we were ready to get started.
For the frosted glass vase, I wanted to use rubber bands to give it a cool look. I pre-rubberbanded (I'm sure that's not a word, but I'm going to go with it) my vase at home the night before, and then sprayed it with three coats of frosted glass spraypaint. This vase cost me $0 since Tara purchased the spray paint and I had the vase and rubber bands at home.
For the vase where I painted the inside, I tried to find permenamal paint as suggested, but I had trouble finding it and then accidentally bought acrylic. I decided to try it out, since I wasn't planning to put water in the vase, just some dry twigs. The inside of the vase doesn't look great, but from the outside I achieved my desired look.
Monday, June 4, 2012
DIY Canvas Painting
There are tons of canvas ideas on Pinterest. This is where we pulled our latest Pinterst party inspiration from! Each person brought their own supplies and came with a plan on what they would be painting. We basically bought the cheapest canvas, brushes and paint (on sale for 50 cents a color!) we could from Michael's and went at it.
This blog will be picture heavy as there isn't much explanation needed on how to paint! I apologize for the terrible photos taken with my phone, but here are our paintings!
![]() |
| This one is mine, I made it for the baby's bathroom. |
![]() |
| Becca made this one, she is going to hang it over her baby girl's crib. |
![]() |
| Natalie's painting. |
![]() |
| Kelly's work of art. |
Tuesday, May 8, 2012
DIY Coasters
Month 4 of the Suburban Crafters Pinterest parties went very well! This month it was at my house, and despite my lack of space and the fact that we had more people than ever participate, the project turned out amazing! I chose (with the help of my mom) to make DIY coasters with bathroom tiles and mod podge.
To create these coasters you will need the following supplies:
- 4-8 tiles per set. I did 6 per set, and I found bathroom tiles at Home Depot for 13 cents each!
- Mod Podge, which you can find at any craft store
- Brushes, I like the foam ones shown in the photo
- Scrapbook paper, in the design of your choosing. Also to note, at our party someone used photographs on their coasters, and someone else used newspaper. Feel free to think outside the box!
- A paper cutter or scissors
- Felt, I picked black stiffened felt from the craft store that already had a sticky backing to on it.
- Clear acrylic spray (to make them waterproof!)
So, first step first! I cut all of my paper to the exact size of the tile. Actually, I cut it one centimeter less than the size of the tile. I used my paper cutter to do the measuring, but I suppose you could use a ruler and scissors!
Next, you want to apply Mod Podge to the tile. After you do that, immediately place the cut paper on top of the Mod Podge and align it. Don't worry if it isn't perfect at first, you can slide it around the first few seconds before it hardens.
After that dries for a few minutes, you will then apply another coat on top of the scrapbook paper. I like to do two coats on top of the paper, but let the first one dry for about 15 minutes before applying the second one. I also like to put mod podge on the sides of the tile.
Once the tile dries, you can apply your cut felt (I cut mine into squares a half an inch less than the size of the tile) to the bottom of the tile. I just pulled off the sticky thing and stuck mine on. If your felt isn't already sticky, any type of glue should work well for this.
Once the Mod Podge is completely dry (about 2 hours), you need to spray the top of your coasters with the clear acrylic spray. We layed ours all out in the garage and sprayed them with two coats of the acrylic spray.
I think all of the tiles turned out so great! Here are some closeups.
Here are the ones I made:
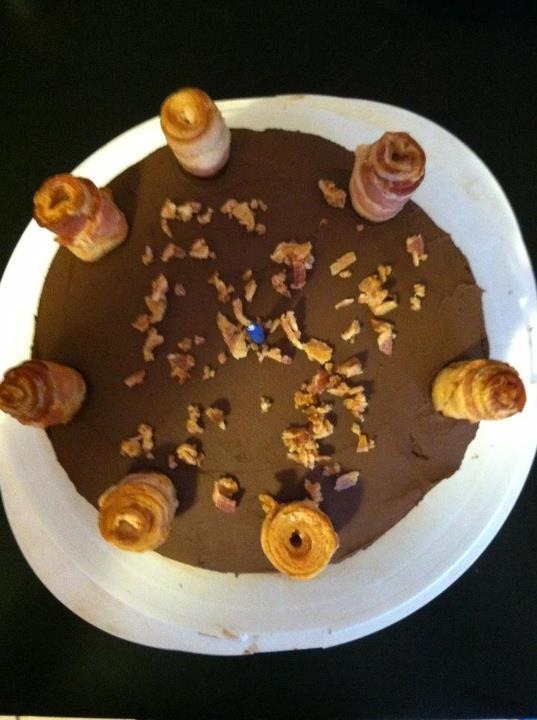
I also wanted to thank my friend Kelly for making me them most amazing chocolate bacon cake for my birthday and bringing it to the party!
Subscribe to:
Posts (Atom)


.jpeg)